How To Make A Pillowcase Dress

I don't sew!
I try to act like I can, but when stitching on bias tape doesn't end up going through onto the other side, I get frustrated.
(Especially when I realize that I set the tension too high, when I'm trying to pull it all out with a seam ripper!)
Being that I haven't sewn anything (other than hemming a pantleg or something) in over 15 years, I wanted my first project to be simple.
As in-- I'm-not-going-to-deal-with-a-pattern kind of simple.
I started looking up these pillowcase dresses that I've been seeing, on Pinterest. (If you look up the damask ones, you'll find absolutely gorgeous ones!)
So of course, I ended up getting the fabric and the ribbon, necessary to make one of these things for my 7 year old.

As it has been sitting for the past month and a half, I've been mulling over how to construct one of those things. (I have a bad habit of jumping into something-- that I know nothing about-- and end up botching it up somehow!)
So today-- in the 85 degree heat (which is uncommon here in Oregon at this time of year), I decided to pull out my sewing machine, and see what I could come up with.
It's just a guide on how to make one. It takes about 45 minutes to do, because you just cut it out, sew up the sides, add the bias tape, make a hem on the bottom, make a hem on the top, and then roll some ribbon through.
First, I used a pillowcase to trace around two layers of fabric. Since I don't know about those special pencils that you're supposed to use, I just used chalk~

When you're done tracing, you are left with this~

Cut it out~

Then fold it in half, lengthwise~

On the cut edge, make your armholes. An easy way to get it right, is use a tea box (or something similar), and round the corners once they're traced~


Unfold it, and you should be left with this~

Reverse it to the wrong side like this~

And then, you're ready to start sewing. Stitch up the sides and stop when you reach the armholes. Like I said, I didn't follow a pattern, so use a seam allowance that is comfortable for you~

When you are finished, you have a choice about how you want to do the bottom of the dress. You can either roll the bottom up twice and make a hem, or you can do it the EASY way, and sew on some bias tape. The dress below depicts folding it up and making a hem. (I apologize for the steps getting a little blurry. I got distracted by my 7 year old wanting lunch, and an old Hazel episode.)~
 |
| I measured about 1cm and ironing on the first fold... |
 |
| ...and then folding it up again 2cm. |
Start stitching across the end of your hem. And then you've got the bottom part done~

Next, add your bias tape along the armholes. (If you don't know how to do bias tape, refer to the post prior to this one-- I'll tell you how to make your own!)

Now, do the same exact thing to the top of the dress that you did at the bottom, leaving the ends open, to slip the ribbon through. With the unfinished edge at the top, fold and iron about 1cm, and then what I did with this, is fold and stitch another 3cm-- which gives just enough room for the ribbon.
 |
| The ribbon can be ran two ways: 1) slip one ribbon through the back, then one through the front, where they will end up being tied into two bows. 2) run one ribbon through the back, pull it through, and have it run through the front. Then tie the ends together for a bow that ties on the side. |
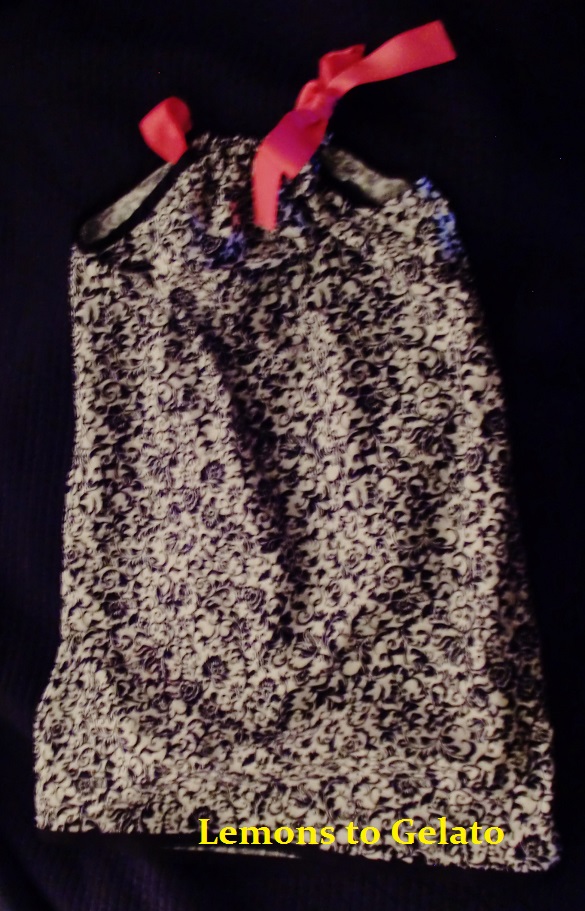
After that's all done, string your ribbon through, and voila! You're done!

Mind you, this was just a test run, to see if I could do it or not. As you can see, I did go a little too short, where it ends up a blouse. (And the clashing ribbon doesn't help much either.) But it's easy enough to where I can confidently start on the nicer fabric; knowing what I need to do now!
**Update

I decided to go ahead and use the damask today as well. (ERG! It looks like a nightgown!) So be careful how you measure. (My mistake was changing my mind from a hem at the bottom, to just adding bias tape-- without making the proper adjustment cuts to it. Oh well. It will fit next year!)
***Update
NOW I've got it down!


..................................................
How To Make Bias Tape
I am a novice seamstress. So on a project (that I decided to on a whim today-- because slaving over a sewing machine on an 85 degree day made so much sense), I realized that I needed some bias tape to finish up an armhole.
What is bias tape? It's not actually tape but more rather a finishing trim, when you don't feel like spending the entire day sewing (and then ripping apart 20 times) fancy techniques for a well-tailored edge. It works great on armholes, for trim, etc.
It's called bias, because unlike the straight up and down/left to right weave that your fabric has, it is cut on the diagonal. This diagonal cut, allows it to stretch, and therefore, become workable as you finish your curved edge.

So when you're working on a project, and realize that you need some, what do you do? You make it from scratch.
And if you barely have any sewing experience-- like myself, you'll be surprised how easy it is to do. Honestly, it's not intimidating at all.
First of all, you get the fabric that you want to make the tape out of. Since you will be cutting out a strip, folding it in half, and then folding the halves again, make sure it's wide enough for your project. (For example, a 1 1/2" strip that you cut out, will end up being about 3/8" of an inch when it's finished!)
So with that said, cut out your desired length strip~
 |
| I am just totally eyeballing it with a ruler as my guide, but obviously you can measure it and cut it according to how you do your project. And there's no need to mind the jagged edges, because those are going to be folded inwards and out of sight anyways. |
Fold the strip in half, and iron~

After that, fold one half inward, and iron again. (Do the same for the other side.)~

When you're done, it should look like this~


After that, start sewing it onto your project.

Word of warning though, make sure that your stitch is also going through the other side of the bias tape! After I'm done posting this, I'm going to have to go back and rip out the trim from a pillowcase dress that I'm making for my daughter. (Not fun, since this is the first time I've really sewn anything in over a decade, and didn't realize that there was too much tension on the machine!)
Anyways...
But that is how you make your own bias tape. Hopefully, the directions are not too confusing!
Happy sewing!
No comments:
Post a Comment